
Kubernetes Cluster Mesh - OpenStack + RKE + MetalLB + Cilium
I will guide you through the setup of a Kubernetes Cluster Mesh using OpenStack as hypervisor, RKE as K8S deployer, MetalLB as Load Balancer provider and Cilium as CNI. In this tutorial we will use a single network, but more complex network setup should work just fine as long as routing is properly in place.
Overall Architecture

Pre-requisites
- OpenStack
- Image: Ubuntu bionic - 18.04 (Linux kernel >= 4.9 is a requirement from Cilium)
- Flavor: m1.medium or bigger
- Network: one or multiple networks; if multiple networks, they should be able to route traffic between each other, at least from the subnets, or IP range, allocated to the MetalLB. Network used for K8S nodes needs internet connectivity.
- CLI access: to disable anti-spoofing on K8S VM’s port. We need to allow traffic from the LoadBalancer ExternalIP that MetalLB will setup (explanation)
- RKE v1.0.0 (but any version should work fine)
- Kubectl >= 1.9
Deploy the clusters - RKE
We need two three nodes cluster for this demo.
Create VMs
As we deploy in OpenStack, there are multiple ways to create the VMs.
We will use a HEAT template that will:
- create 3 VMs
- setup Docker using RKE script
- mount the BPF filesystem
Make sure to edit the name, the image, the flavor, the network and the key_name.
For the first cluster, we will use name k8s-cluster1-node-%index% and for the second cluster we will use k8s-cluster2-node-%index%
Here is the HEAT template:
heat-k8s-cluster.yml
``` heat_template_version: 2015-04-30 resources: k8s-cluster1: type: OS::Heat::ResourceGroup properties: count: 3 resource_def: type: OS::Nova::Server properties: name: k8s-cluster1-node-%index% flavor: m1.medium image: bionic-18.04 networks: - network: vlan197_net key_name: adetalhouet security_groups: - default user_data: | #!/bin/sh # setup docker sudo apt update -y curl https://releases.rancher.com/install-docker/18.09.sh | sh sudo usermod -aG docker ubuntu # Add BPF as mount for Cilium sudo echo "bpffs /sys/fs/bpf bpf defaults 0 0" >> /etc/fstab sudo mount /sys/fs/bpffs ```Either through the UI, or using OpenStack CLI, create both HEAT stack:
$ openstack stack create -t k8s-cluster-1.yaml k8s-cluster-1
$ openstack stack create -t k8s-cluster-2.yaml k8s-cluster-2
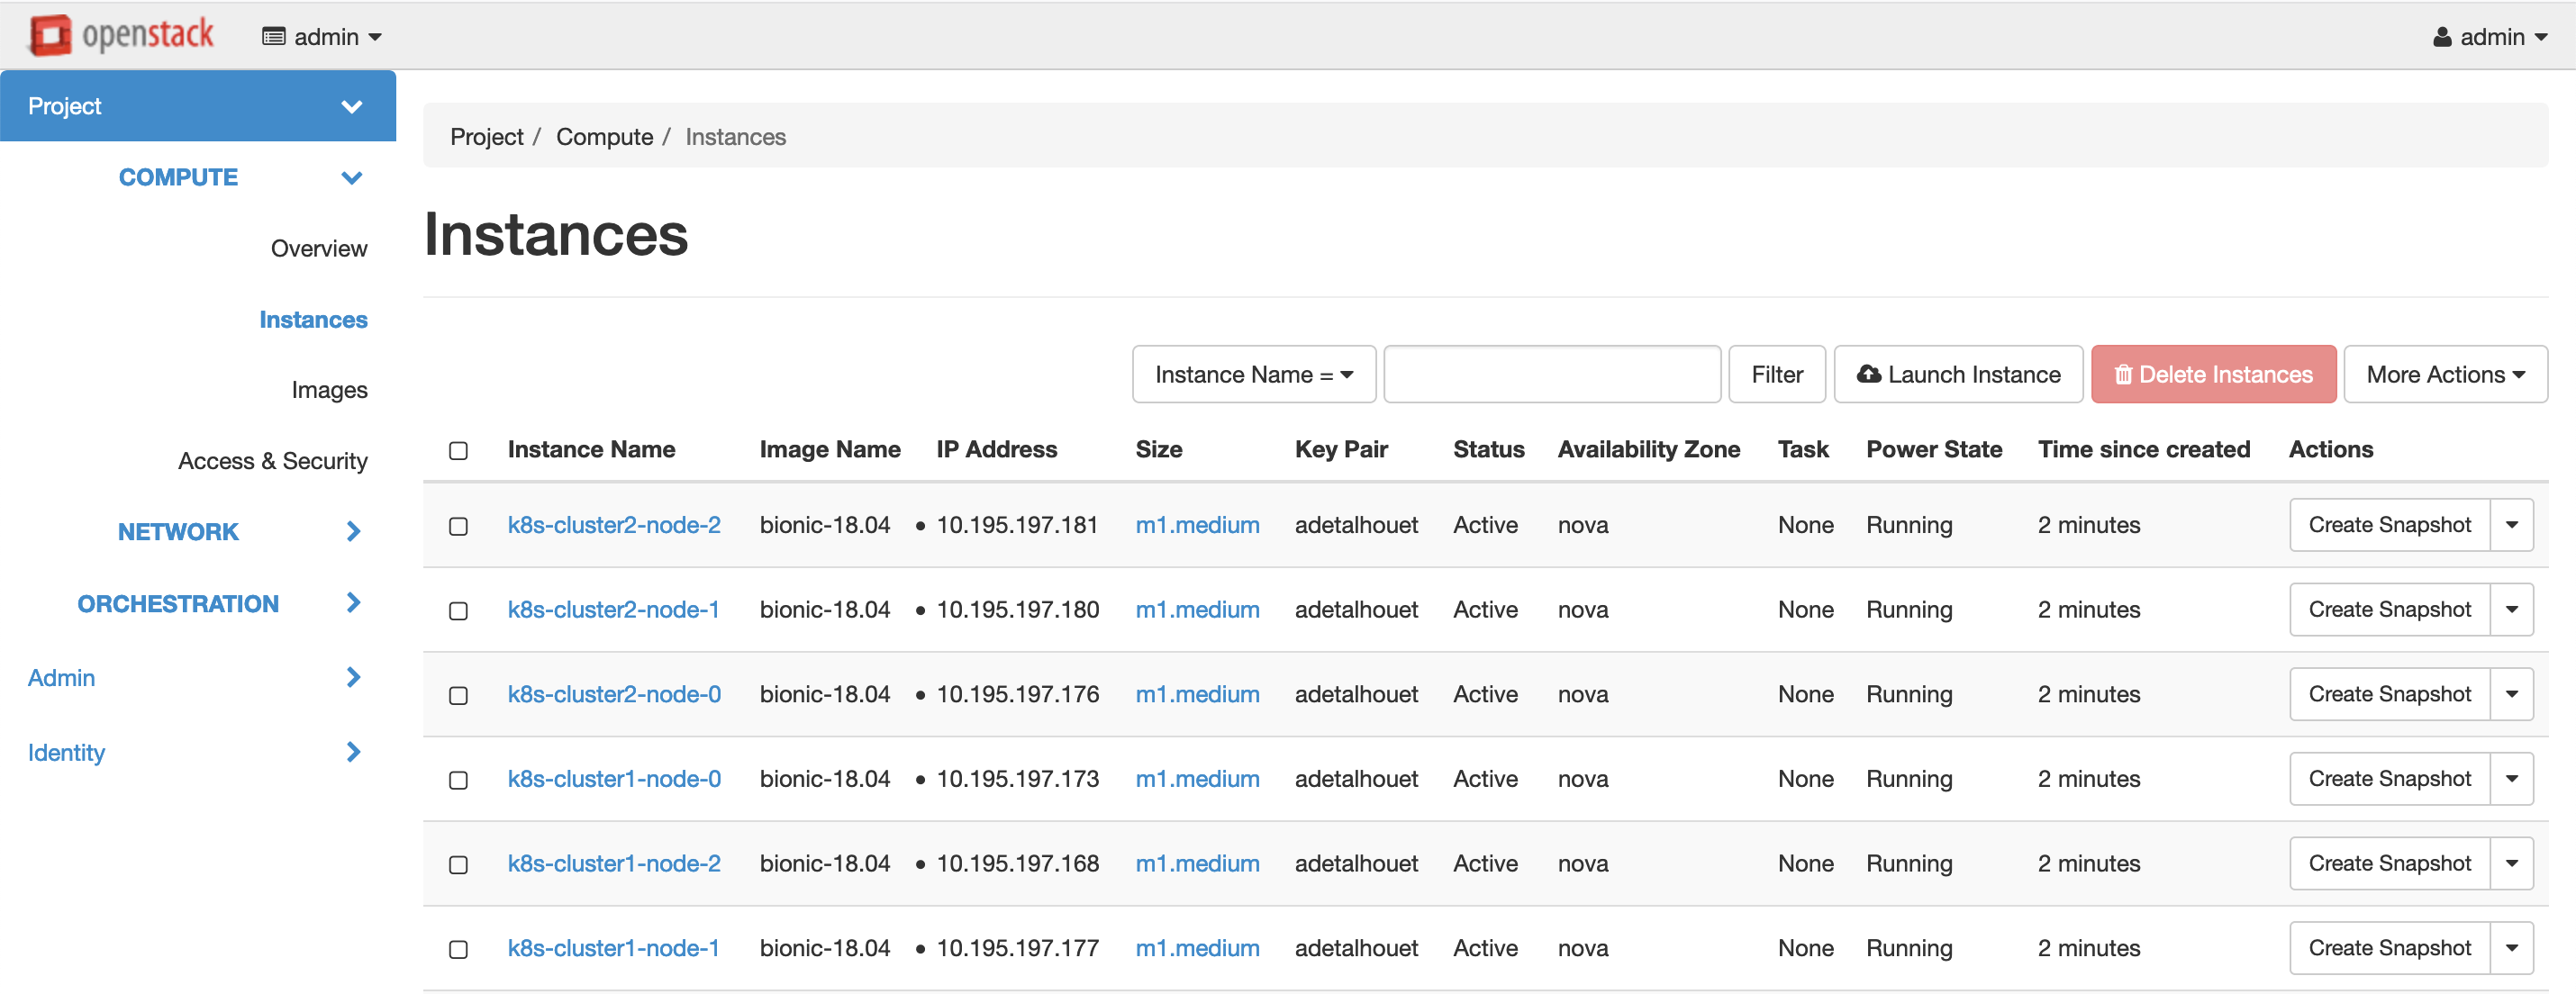
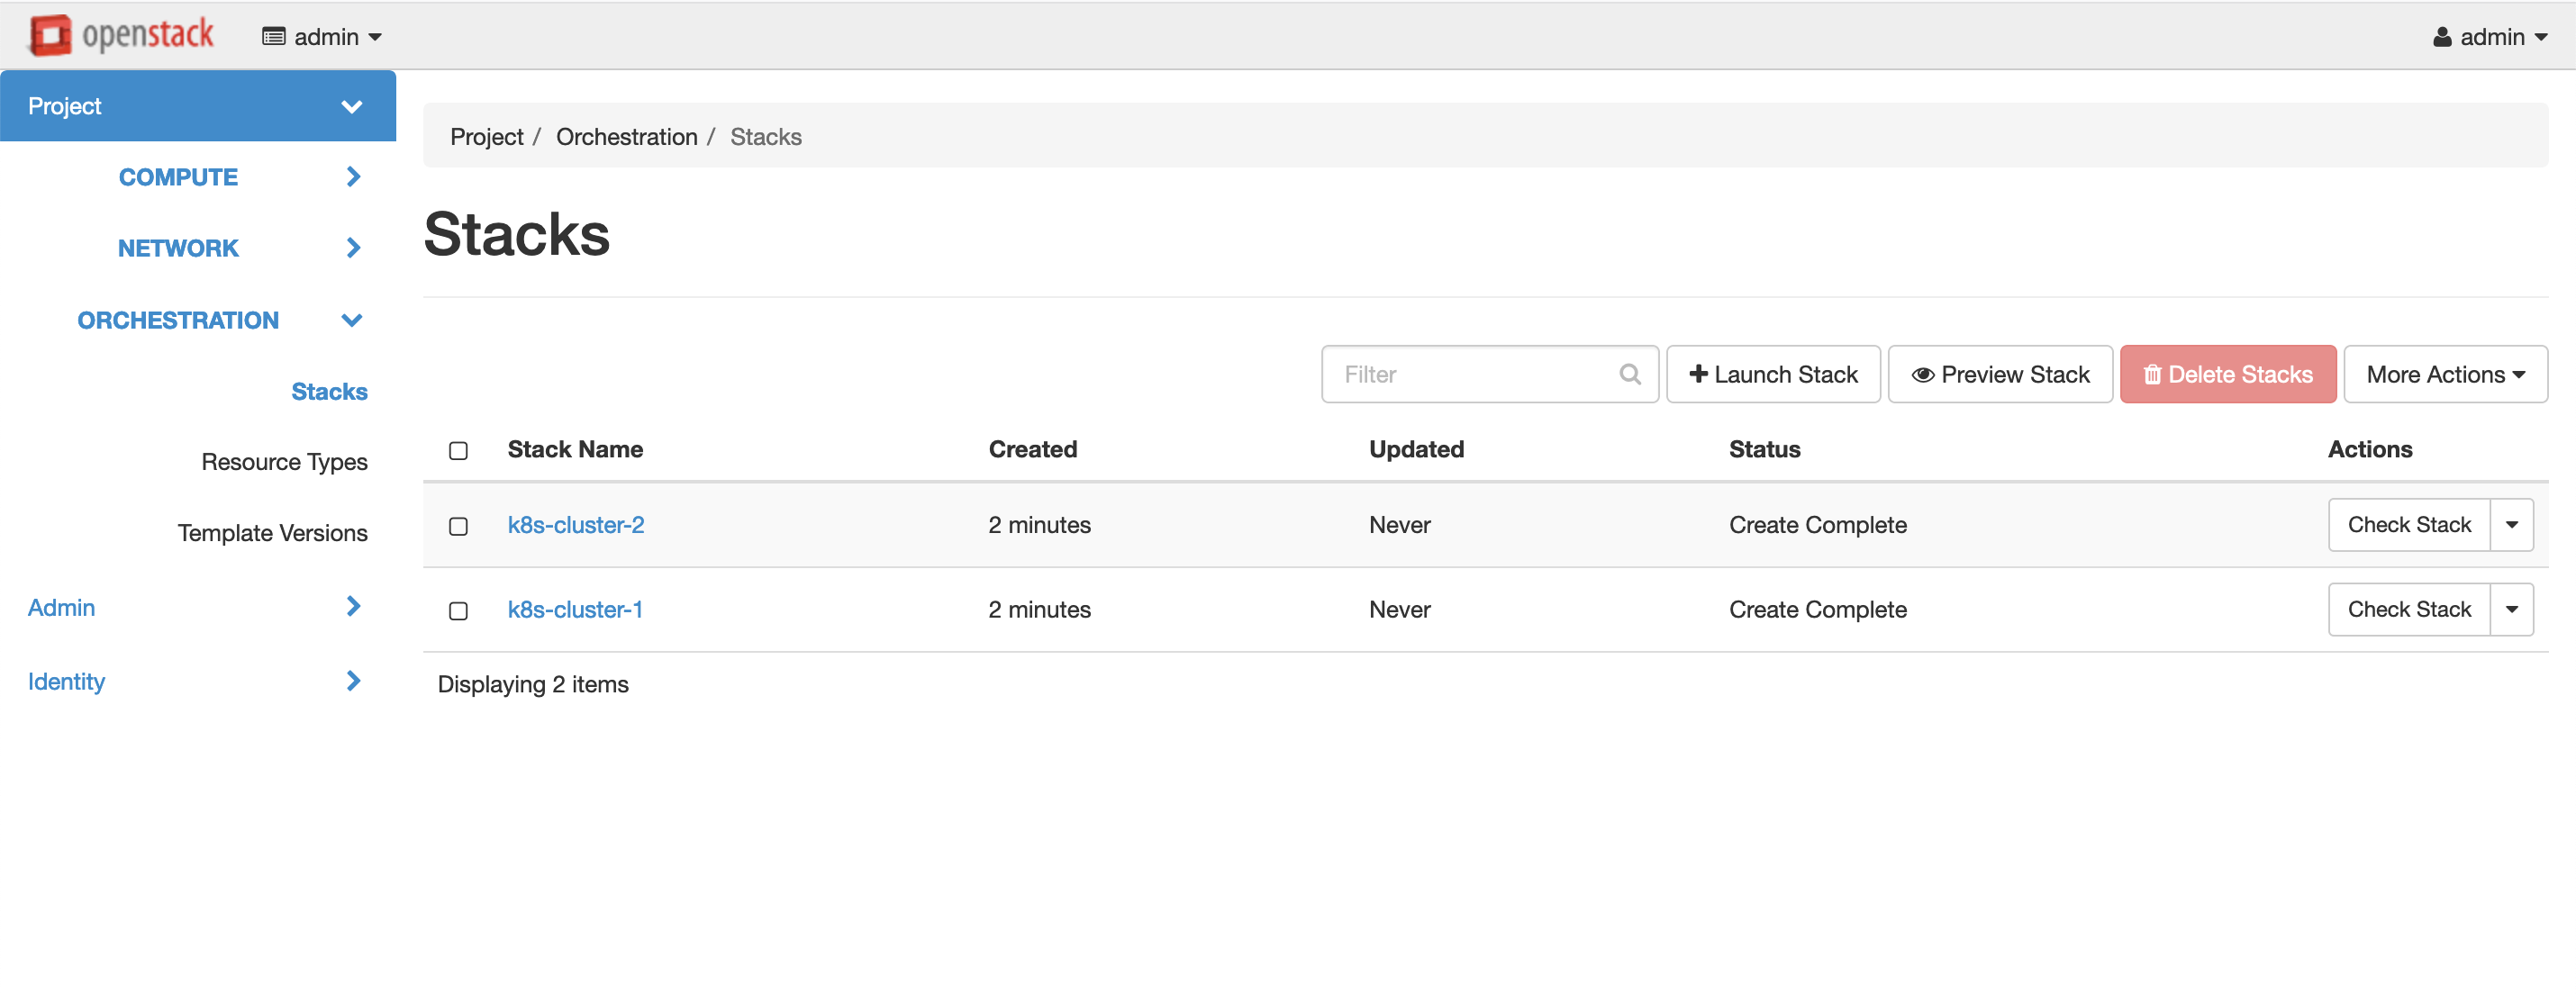
You should get the following in Horizon:
Openstack Instances
Openstack Stacks
Deploy Kubernetes
Now that we have our 6 VMs provisioned with Docker we can deploy Kubernetes.
Attention
- you must not deploy any CNI, as we will deploy Cilium in following step.
- you will need to define distinct
cluster_cidrfor each cluster
All we need to do is to run RKE as follow; this will prompt you multiple questions to guide you through the cluster setup.
$ rke config
Once done, a cluster.yml file have been generated; you need to edit the file to set network plugin to none, and to set unique cluster_cidr. Then you can deploy the cluster
Make sure to have each cluster.yml file in seperated folder, as the process will write in the folder where the command is executed the file kube_config_cluster.yml which is the KubeConfig to access the cluster.
# Deploy the cluster
$ rke up
Here is the cluster.yml I used:
cluster.yml
``` nodes: - address: 10.195.197.165 port: "22" internal_address: "" role: - controlplane - worker - etcd hostname_override: "" user: ubuntu docker_socket: /var/run/docker.sock ssh_key: "" ssh_key_path: ~/.ssh/id_rsa ssh_cert: "" ssh_cert_path: "" labels: {} taints: [] - address: 10.195.197.175 port: "22" internal_address: "" role: - controlplane - worker - etcd hostname_override: "" user: ubuntu docker_socket: /var/run/docker.sock ssh_key: "" ssh_key_path: ~/.ssh/id_rsa ssh_cert: "" ssh_cert_path: "" labels: {} taints: [] - address: 10.195.197.170 port: "22" internal_address: "" role: - controlplane - worker - etcd hostname_override: "" user: ubuntu docker_socket: /var/run/docker.sock ssh_key: "" ssh_key_path: ~/.ssh/id_rsa ssh_cert: "" ssh_cert_path: "" labels: {} taints: [] services: etcd: image: "" extra_args: {} extra_binds: [] extra_env: [] external_urls: [] ca_cert: "" cert: "" key: "" path: "" uid: 0 gid: 0 snapshot: null retention: "" creation: "" backup_config: null kube-api: image: "" extra_args: {} extra_binds: [] extra_env: [] service_cluster_ip_range: 10.45.0.0/16 service_node_port_range: "" pod_security_policy: false always_pull_images: false secrets_encryption_config: null audit_log: null admission_configuration: null event_rate_limit: null kube-controller: image: "" extra_args: {} extra_binds: [] extra_env: [] cluster_cidr: 10.44.0.0/16 service_cluster_ip_range: 10.45.0.0/16 scheduler: image: "" extra_args: {} extra_binds: [] extra_env: [] kubelet: image: "" extra_args: {} extra_binds: [] extra_env: [] cluster_domain: cluster.local infra_container_image: "" cluster_dns_server: 10.45.0.10 fail_swap_on: false generate_serving_certificate: false kubeproxy: image: "" extra_args: {} extra_binds: [] extra_env: [] network: plugin: none options: {} node_selector: {} authentication: strategy: x509 sans: [] webhook: null addons: "" addons_include: [] system_images: etcd: rancher/coreos-etcd:v3.3.15-rancher1 alpine: rancher/rke-tools:v0.1.51 nginx_proxy: rancher/rke-tools:v0.1.51 cert_downloader: rancher/rke-tools:v0.1.51 kubernetes_services_sidecar: rancher/rke-tools:v0.1.51 kubedns: rancher/k8s-dns-kube-dns:1.15.0 dnsmasq: rancher/k8s-dns-dnsmasq-nanny:1.15.0 kubedns_sidecar: rancher/k8s-dns-sidecar:1.15.0 kubedns_autoscaler: rancher/cluster-proportional-autoscaler:1.7.1 coredns: rancher/coredns-coredns:1.6.2 coredns_autoscaler: rancher/cluster-proportional-autoscaler:1.7.1 kubernetes: rancher/hyperkube:v1.16.3-rancher1 flannel: rancher/coreos-flannel:v0.11.0-rancher1 flannel_cni: rancher/flannel-cni:v0.3.0-rancher5 calico_node: rancher/calico-node:v3.8.1 calico_cni: rancher/calico-cni:v3.8.1 calico_controllers: rancher/calico-kube-controllers:v3.8.1 calico_ctl: "" calico_flexvol: rancher/calico-pod2daemon-flexvol:v3.8.1 canal_node: rancher/calico-node:v3.8.1 canal_cni: rancher/calico-cni:v3.8.1 canal_flannel: rancher/coreos-flannel:v0.11.0 canal_flexvol: rancher/calico-pod2daemon-flexvol:v3.8.1 weave_node: weaveworks/weave-kube:2.5.2 weave_cni: weaveworks/weave-npc:2.5.2 pod_infra_container: rancher/pause:3.1 ingress: rancher/nginx-ingress-controller:nginx-0.25.1-rancher1 ingress_backend: rancher/nginx-ingress-controller-defaultbackend:1.5-rancher1 metrics_server: rancher/metrics-server:v0.3.4 windows_pod_infra_container: rancher/kubelet-pause:v0.1.3 ssh_key_path: ~/.ssh/id_rsa ssh_cert_path: "" ssh_agent_auth: false authorization: mode: rbac options: {} ignore_docker_version: false kubernetes_version: "" private_registries: [] ingress: provider: "" options: {} node_selector: {} extra_args: {} dns_policy: "" extra_envs: [] extra_volumes: [] extra_volume_mounts: [] cluster_name: "" cloud_provider: name: "" prefix_path: "" addon_job_timeout: 0 bastion_host: address: "" port: "" user: "" ssh_key: "" ssh_key_path: "" ssh_cert: "" ssh_cert_path: "" monitoring: provider: "" options: {} node_selector: {} restore: restore: false snapshot_name: "" dns: null ```After a few minutes, you should have the kube_config_cluster.yml present in the folder, and the cluster available.
Let’s validate the nodes are up:
$ export KUBECONFIG=kube_config_cluster.yml
$ kubectl get nodes
NAME             STATUS     ROLES                      AGE     VERSION
10.195.197.168   NotReady   controlplane,etcd,worker   2m29s   v1.16.3
10.195.197.173   NotReady   controlplane,etcd,worker   2m29s   v1.16.3
10.195.197.177   NotReady   controlplane,etcd,worker   2m30s   v1.16.3
So the nodes are up, but marked as NotReady. This is expected, because we didn’t deploy any CNI, hence the DNS isn’t up and running:
$ kubectl get pods -n kube-system
NAME                                      READY   STATUS              RESTARTS   AGE
coredns-5c59fd465f-c95t6                  0/1     ContainerCreating   0          3m30s
coredns-autoscaler-d765c8497-9g47j        0/1     ContainerCreating   0          3m29s
metrics-server-64f6dffb84-np78x           0/1     ContainerCreating   0          3m25s
rke-coredns-addon-deploy-job-rnslc        0/1     Completed           0          3m33s
rke-ingress-controller-deploy-job-pwmz8   0/1     Completed           0          3m23s
rke-metrics-addon-deploy-job-k5shj        0/1     Completed           0          3m28s

$ kubectl describe pod coredns-5c59fd465f-c95t6 -n kube-system
--[cut]--
  Warning  NetworkNotReady  3m12s (x25 over 3m59s)  kubelet, 10.195.197.173  network is not ready: runtime network not ready: NetworkReady=false reason:NetworkPluginNotReady message:docker: network plugin is not ready: cni config uninitialized
So let’s deploy Cilium CNI!
Deploy Cilium CNI
To do so, simply follow the installation documentation provided by Cilium:
Deploy MetalLB
To do. so, simply follow the installation documentation provided by MetalLB.
Configure MetalLB
We will use L2 configuration; you need a subnet or an IP range. See Layer 2 Configuration
$ echo 'apiVersion: v1
kind: ConfigMap
metadata:
  namespace: metallb-system
  name: config
data:
  config: |
    address-pools:
    - name: default
      protocol: layer2
      addresses:
      - 10.195.197.190-10.195.197.199' > metalld.yaml

$ kubectl apply -f metalld.yaml
Deploy the cluster mesh
To do so, follow the instruction from Cilium.
Attention
-
At the step Expose the Cilium etcd to other clusters where you need to expose the Cilium etc to other cluster, this is where MetalLB will be of use; it will be the one provisioning the IP for the service.
cilium-etcd-external.yml
``` apiVersion: v1 kind: Service metadata: name: cilium-etcd-external namespace: kube-system spec: ports: - port: 2379 selector: app: etcd etcd_cluster: cilium-etcd io.cilium/app: etcd-operator type: LoadBalancer ```$ kubectl apply -f cilium-etcd-external.yml $ kubectl get svc cilium-etcd-external NAME TYPE CLUSTER-IP EXTERNAL-IP PORT(S) AGE cilium-etcd-external LoadBalancer 10.45.157.32 10.195.197.190 2379:30363/TCP 31s -
Before the step Establish connections between clusters, you need to disable anti-spoofing on the VM ports in OpenStack, for the IPs of the
cilium-etcd-externalservices.Get the list of port, you’ll need the ID
$ openstack port listThen, for each port, add to the
allowed-addresslist the external-ip of eachcilium-etc-externalservice.$ openstack port set e9a533a9-e6be-4930-ba74-ba25b9fed059 --allowed-address ip-address=10.195.197.190 $ openstack port set e9a533a9-e6be-4930-ba74-ba25b9fed059 --allowed-address ip-address=10.195.197.201You can then proceed by loading the
clustermesh.yamlsecret file and restart the cilium agent.
Validate cluster mesh
Cilium documentation provides an extensive list of things you can do to troubleshoot and validate the mesh is successful.
Here is the command to see whether the mesh is established
$ kubectl -n kube-system exec -ti cilium-vb6vv cilium node list
Name                      IPv4 Address     Endpoint CIDR   IPv6 Address   Endpoint CIDR
cluster1/10.195.197.162   10.195.197.162   10.42.0.0/24
cluster1/10.195.197.164   10.195.197.164   10.42.2.0/24
cluster1/10.195.197.167   10.195.197.167   10.42.1.0/24
cluster2/10.195.197.163   10.195.197.163   10.44.1.0/24
cluster2/10.195.197.166   10.195.197.166   10.44.0.0/24
cluster2/10.195.197.172   10.195.197.172   10.44.2.0/24
As you can see, Cilium agent from Cluster1 is able to see nodes from Cluster2. The way the cluster mesh works is by having each Cilium agent watching event on the cilium etcd of the other cluster; that way, when there is a change, it is propagate to all the clusters.